Wreaths (from the Middle English wrethe, a twisted garland or ring of leaves and flowers) have been used ceremonially...
Posted by The Heirloom Gardener - John Forti on Sunday, December 5, 2021
Wreaths (from the Middle English wrethe, a twisted garland or ring of leaves and flowers) have been used ceremonially...
Posted by The Heirloom Gardener - John Forti on Sunday, December 5, 2021
 |
| Photo courtesy of StrawberryPlants.org |
From a news article by Karly Regan, Penn State Extension, Franklin County
As winter sets in for our area, the fresh berries of summer
may be far from our minds! However, to have delicious strawberries to eat, we
need to make sure to tuck our plants in for winter properly. If you haven’t
already, now is the time to put mulch or row covers over strawberry beds to
protect them from winter temperatures.
In matted row production, straw mulch is an essential tool
for protecting the crop from winter extremes. Apply four inches of clean mulch
(about two tons of straw per acre) after temperatures have dropped into the
mid-20s F for 3-4 consecutive days. At this point, plants will have developed
some cold tolerance and gone dormant for the season. In our area, this
typically occurs between late November and late December. In addition to protecting
above-ground tissue from cold temperatures, the mulch protects root and crowns
from exposure due to frost heaving. In areas exposed to wind, straw mulch can
be held in place by laying wire or plastic fencing over the mulch with bricks
or other heavy objects weighting the fencing down. Avoid using leaves as mulch
since these can trap too much moisture and lead to ice formation.
For plasticulture production systems, floating row covers
are applied when daytime temperatures reach into the low 70s to enable
continued growth and crown and bud formation. The row covers will also provide
winter protection by reducing desiccation and exposure to low temperatures.
In the spring, you can remove straw mulch when approximately 25% of your plants are producing new growth and temperatures remain above the critical temperatures for strawberry blooms, around 20° F. Another good metric for if it’s time to remove the mulch is when soil temperatures reach 40° F at a 4-inch depth. If early-fruiting is a goal in plasticulture beds, row covers should be removed early in spring.
If temperatures are fluctuating, it is best to partially
remove mulch so that photosynthesis can begin but some mulch is still
insulating the roots. Once removing, move mulch into the aisles between rows or
other area nearby in case it needs to be reapplied for a springtime cold snap.
If using row covers over plasticulture, follow the same practice of removing to
between the rows in case it needs to be put back over plants for colder
temperatures.
* * *
HOLIDAY SPECIAL Price reduction.

 |
| Eastern Mistletoe- Phoradendron leucarpum in Northeast Texas (Loadmaster David R. Tribble) |
There are 1,300 mistletoe species worldwide.with 30 in the continental US and Canada and 6 others in Hawaii.
All mistletoes grow as parasites on tree and shrub branches. The genus name of North America’s oak mistletoe, the most common in the eastern US—is Phoradendron, Greek for “tree thief.”
Not very romantic! Ancient Anglo-Saxons noticed that mistletoe often grows where birds leave droppings, which is how mistletoe got its name: In Anglo-Saxon, “mistel” means “dung” and “tan” means “twig,” hence, “dung-on-a-twig.”
 |
| Photo: Nellie Benson, Wikimedia Commons |
The Romans associated mistletoe with peace, love and understanding and hung it over doorways to protect the household.
The mistletoe’s white berries are toxic to humans but are favored during autumn and winter by mammals from deer to chipmunks and bird such as robins, chickadees, bluebirds and mourning doves.
Brown-Honeyeater
feeding-on-mistletoe
Three U.S. butterflies depend on mistletoe for survival: the great purple hairstreak, the thicket hairstreak and the Johnson’s hairstreak. These butterflies lay eggs on mistletoe, the caterpillars eat the leaves, and the adults feed on mistletoe nectar as do some native bees.
CKagan, Master Gardener
* * *
HOLIDAY SPECIAL Price reduction.

Winter
sowing is planting seeds outdoors in a protected container during winter. The
container remains outdoors until the seedlings emerge in the spring.
There
are benefits to winter sowing. When
you direct sow in the ground, the seeds are at the mercy of Mother Nature. They
can be washed out in downpours; eaten by animals; desiccate in the wind; or rot
in the soil. They are more protected in a container and the spring seedlings do
not need to be hardened off before planting in the garden. Winter sowing is
ideal for those with limited indoor space for seed starting. No special
lighting or equipment is required for germination.
The
best time to winter sow perennials and annuals is generally December to March
depending on the weather conditions in your area. These seeds receive a
consistent period of moist, cold temperatures before germination occurs in
spring.
You
can provide a protected, cold environment in a DIY mini greenhouse for
seedlings. This can be a family-friendly activity for parents and
children.
INSTRUCTIONS
Clean container — Wash and rinse with mild water/bleach solution (1 Tbsp. per gallon) milk jugs or suitable (material that lets light in) containers. Discard the top. The opening allows rain and melting snow to keep the soil moist.

Cut container — If not using
a container with a hinged lid, measure 5” up from the bottom and mark around
the sides. Lay it on its side and cut all the way around, leaving about 2”
(under the handle, if using a jug with a handle) so that the top hinges open. Children
can measure and mark.
Create drainage - Cut 1/8″-1/4″ diameter holes by using a knife, screwdriver or nail to poke 6 to 8 holes and 4 to 6 holes about ½” up from the bottom on the sides. This is important--if you don’t make drainage holes, your seeds will drown! If using a container with a hinged lid, poke a few holes in the top of the lid, too, to let rain and snow in.

Sow
the seeds — Space them a bit closer than on the packet but at the listed depth.
Be sure they are covered. Seedlings can be thinned after germinating in the
spring.

Label the container - Label with the type of seed and date of sowing with a permanent marker.
Set outdoors and leave! – Site the container in an area that receives winter sun. Do not place the container on a covered porch as the seeds require the moisture from the rain and snow. They should experience all the weather conditions they would in nature. Place containers in a milk crate if conditions are windy. Forget about your containers until the spring when the seed germinate.

Spring Care
In spring, once the
weather starts to warm up, check on the
moisture inside your mini greenhouses. Check for condensation or lift the
containers for weightiness. If some of your containers have condensation but
others don't, it is a good bet that those that don't have condensation could
use a good drink of water. Also, if some of your containers are lighter in
weight when compared to other containers it is a good bet those lighter
containers could use a drink, too.
The easiest way to water
your containers is to soak them. Put a couple of inches of water in a bucket or
large plant saucer and set the container into the bucket of water for
approximately 15 to 30 minutes until the container has absorbed as much water as
it is going to. Don't worry about over watering, the excess will drain out the
bottom holes.
On warm spring days,
open the container to keep the seedlings from getting too warm. Close again (no
need to re-tape) if evenings are cool. When seedlings are tall enough, or reach
the top of the container, and have grown their first few sets of leaves, it’s
time to plant them into the garden. They should have a good root system but
remove carefully as roots may be tangled together. Some plants will need to
wait until after the last frost date (May 12 for Franklin County). Cool weather
crops, such as lettuce, can be planted out 4-6 weeks before then.
When seedlings are ready to transplant, be sure to bury the tube in the ground so the edge is below the soil surface.
Spring Watch for winter sowing
Other resource: Penn State Winter Sowing
CKagan, Master Gardener
* * *
HOLIDAY SPECIAL Price reduction.

Materials: Toilet paper rolls and scissors
Paper seed pots are not only economical and thrifty
but also reduce environmental waste plus make transferring seedlings to the
garden easy. Once in the garden, the biodegradable cardboard tubes will fully
decompose in soil. This means that when it's time for planting out, the roll
and its seedling can be transplanted together, reducing transplantation shock
and potential root damage. This is particularly useful for plants that develop long
taproots such as milkweed, root vegetables, sunflowers, and herbs such as
parsley and dill.
They are good to use in
recycled containers for winter sowing. (See the eBlog post for Winter Sowing).
For shorter pots, cut the roll in half across the middle.
Fold the roll in half one way. Then, fold it in half the other way, so the creases from the last fold line up and to make a square. It works best if you press a ruler or pencil side along the creases to make them sharper.


.jpg)
Stand them up and fill with potting soil and add your seeds. In a winter sowing jug be sure to bring the soil up and around the tubes and even with the top.

When seedlings are ready to transplant, be sure to bury the tube in the ground so the edge is below the soil surface.
CKagan, Master Gardener
* * *
HOLIDAY SPECIAL Price reduction.
 |
| Prepare your landscape for winter weather (Kagan) |
Before
waking up one morning to a beautiful but snowy or icy wonderland, think about the
winter weather ahead. After cleaning up the landscape, homeowners should look
at their yard and contemplate winter events such as wind, snow, ice, and road
salt.
When
you have finished raking up the last of the leaves, and clearing them out of
the rain gutters, look up at the bare trees. Brian Wolyniak, Penn State Urban
Forester, has these suggestions.
“Winter
is an ideal time to inspect tree branches for defects, decay, or structural
issues without the camouflage of leaves. Wounds, decay cavities, crooked
growth, and weak branch unions are problems in the making that can be more
easily spotted when the trees are bare.”
 |
| Save big pruning jobs for the arborists (KKnuepfer) |
Wolyniak
says that pruning is both an art and a science. While homeowners can take care
of some of their tree maintenance, he suggests only pruning what can be reached
from the ground. Call a certified tree arborist for other pruning needs.
 |
| Windbreaks can protect from road salt spray.(Kagan) |
Protect tender perennials and shrubs from wind, snow, ice, and salt spray. Use burlap to make a protective shield around the plant. It is good to also protect any tender perennial plants by wrapping them in burlap or protecting them with windbreaks. Some shrubs such as acuba (gold dust) plants and arborvitae may benefit from being wrapped loosely to keep their branches from breaking under heavy ice or snow.
 |
| Keep the burlap away from the plant. (Morton Arboretum) |
Also be aware of how deicers can affect your property. Check out this information on the blog.
Be
prepared and avoid whatever problems you can as we approach our winter season.
CKagan, Master Gardener
* * *
HOLIDAY SPECIAL Price reduction.
 |
| Photo by Karen Knuepfer |
***Fall Pruning…Simple, right?

 |
| Crape myrtle with seed pods reaches to the sky. |

 |
| Craighead House (Courtesy of Comm. to Restore) |
 |
| Pollinator Garden |
The Craighead property includes the original house built in 1886, currently in restoration, property along the Yellow Breeches limestone stream, a popular fly-fishing spot, and grounds where nature thrives. From the 1800’s through the 1990's three well-known nature lovers spent time at the Craighead House - twin brothers Frank Jr. and John plus their sister Jean Craighead George. Frank and John are best known for establishing falconry in the U.S. and their study of grizzly bears in Yellowstone National Park. Writing more than 100 children’s books related to nature, including Newberry Award winners Julie of the Wolves and My Side of the Mountain, Jean was cited as a Conservation Hero by the U.S. Fish and Wildlife Service.
 |
| Aster w/Clouded Yellow |
From an article on the Cumberland County Master Gardener site: “The garden beds include a pollinator bed that was funded through the Chesapeake Bay Foundation and the Yellow Breeches Watershed Association. The beds are maintained by volunteers, several of whom are Master Gardeners. In 2021 Craighead House was approved as a Master Gardener demonstration site focusing on educating the public about pollinators, native plants, and invasive species.”
There
were fall blooms in the garden and many pollinators visiting during our visit
on October 15, 2021. We were amazed at
the size of the bees on the Mountain Mint
and the variety of bees, butterflies and other pollinators on the Aster
flowers and Golden Rod. Native plants surround the house along the porch and around
the property. The property looks like it might have when the family came for
summers in the 1930’s.
In various places around the house area there are signs with information about pollinator plants, invasive plants and native plants. A springtime and summer visit will no doubt show blooms on many of the plants that are now going dormant.

 |
| Kitchen Wall (Courtesy of the Sentinel) |
The house is being restored and I wandered around the wrap-around porch looking in windows. The kitchen area was filled with storage boxes but I noticed some drawing on the walls. My thought was that when it was abandoned it was visited and graffiti added. I was surprised to see the front door open so, after calling out, I ventured in. Rooms were empty of furniture and I went to the kitchen. WOW!
All the walls in the kitchen were covered with more than 250 drawings, paintings, cartoons, and doodles, in addition to some well-done art sketches. One of the dates is 1929 and others as recent as the 1970’s. I discovered in the brochure that the artwork that was done by several generations of family and friends is being preserved during the restoration. Many are signed with a date or other identification. One local resident, Tom Benjay, has taken on the task of trying to identify the artists.

 |
| Postcards for sale (Craighead House website) |

The Craighead House is located at 318 East Old York Road, Carlisle, PA 17015. Parking is available in the gravel parking lot located off Old York Road to the left of the house. The grounds are open daily to the public, free of charge, from dawn to dusk.
Photos: Carol Kagan except for Kitchen Wall & Craighead House & postcards
* * *
(From my Gardening Column in the Franklin County Free Press)
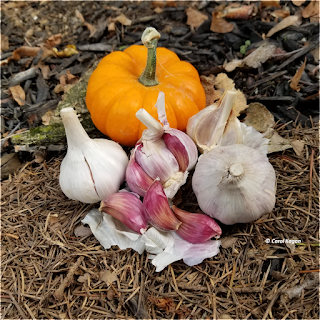
It’s garlic planting time -
now until early November, before a local freeze. One bulb of garlic with 8 to
10 cloves will give you 8 to 10 bulbs next year. A fine return for your
patience as garlic has a long growing season. Garlic takes 8 to 9 months to harvest
so fall plantings won’t be ready until May or June next year. Fall is the best
time to plant as it allows the roots to develop. You will be planting garlic
cloves, the individual pieces from the garlic bulb.
There are two types of
garlic – softneck and hardneck – the neck referring to the stem. Softneck types
have a long shelf life, mild flavor, and their leafy stem makes them easy to
braid. They are the ones most often stocked by grocery stores. Hardneck are
recommended by Penn State for southern areas in the state.
1-Buy your bulbs from your
local nursery, garden center, or mail order from catalogues. Remember when you
buy that there are from 8 to 12 cloves per bulb but you will want to plant only
the biggest.

3-You will need to break the bulbs to get the cloves to plant. Don’t do this more than a day before planting as the root end will dry out making it have to get established. Sort the cloves keeping the biggest to plant.
4-Plant upright with the
root nodule down about 2-4” into the soil, spacing them 4-6” apart. Leave 6”
between rows.
5-Water them well for 3-4 days then mulch with 2-4” of straw or shredded leaves. For proper bulb formation, water weekly as needed and side dress with nitrogen rich fertilizers until the flower stalks (scapes) appear. Allow the soil to dry before you harvest. Check out this information from the Allegheny Master Gardener program.
6-Use a garden fork to lift
a few bulbs to see if they are mature.

7-After harvesting, allow
them to dry and harden in a shady, well-ventilated, shaded area for a few
weeks. Brush away the dirt and trim the roots and tops within an inch of the
bulb.
CKagan, Master Gardener
* * *
Lemon Balm (Melissa officinalis) MONDAY MYTH: You can buy plants that repel mosquitoes. MYTH: There are plants that will make your sum...


