Showing posts with label native plants. Show all posts

Monday, May 18, 2026

Summer Watering Guide


Summer Watering Guide for Franklin County Gardens

Franklin County enters Summer 2026 under a Drought Warning, and we need to consider our watering practices. A Drought Warning means that water supplies are stressed and conservation measures are needed to manage our limited resources. We are running behind seasonal norms for rainfall and gardeners should expect soils to dry more quickly and plants to show stress sooner than in an average year.

A garden drinks in many different ways, and understanding those needs is the difference between plants that merely survive and plants that truly flourish.

💧 Watering Basics for Flower Gardens, Vegetable Beds, and Lawns

Healthy gardens depend on steady, deep watering—just enough to keep roots growing downward, not so much soil stays soggy. Most flowers and vegetables need about 1 inch of water per week, whether it comes from rain or your hose. Lawns need roughly the same amount, though cool‑season grasses can tolerate brief dry spells.

🌼 Flower & Vegetable Gardens

  • Water deeply, not lightly. Aim for soaking the top 6–8 inches of soil. Shallow sprinkling encourages weak, surface‑level roots.
  • Morning is best. Early watering reduces evaporation and gives foliage time to dry, lowering disease risk.
  • Check soil before watering. If the top 2 inches are dry and crumbly, it’s time.
  • Mulch helps. A 2–3 inch layer of mulch slows evaporation and keeps soil evenly moist. Keep mulch away from the stem.
🌱 Lawns

  • Water early in the day to reduce evaporation and fungal issues.
  • Infrequent, deep watering (once or twice a week) is better than daily sprinkling.
  • Let grass grow a bit taller during hot, dry periods—longer blades shade the soil and conserve moisture.

🌧️ Using a Rain Gauge

A simple rain gauge is one of the most useful tools a gardener can own.

  • Place it in an open area away from trees or buildings.
  • Check weekly totals—if rainfall is less than 1 inch, plan to irrigate.
  • For vegetable gardens, keep a small notebook or phone log to track rainfall and watering patterns.

💦
Using a Bubbler to Water at Ground Level

A hose‑end bubbler (sometimes called a “watering wand bubbler” or “gentle‑flow bubbler”) is one of the easiest ways to deliver slow, deep moisture right where plants need it: at the soil surface, not the leaves.

Soft, low‑pressure flow. Bubblers release water in a quiet, gurgling stream that won’t splash soil onto leaves or erode mulch.

  • Perfect for flowers, vegetables, and young shrubs. The slow soak encourages deep root growth and reduces runoff.
  • Excellent for drought care. Place the bubbler at the base of the plant, let it run for several minutes, then move it to the next plant.
  • Tree watering made easier. Instead of spraying the trunk, set the bubbler in a wide ring beyond the canopy dripline and let it seep into the full root zone.
  • Water early in the day. You’ll lose less to evaporation and help keep foliage dry.

A bubbler turns watering into a calm, controlled process—especially helpful during dry spells when every drop counts.

🌳 Don’t Forget the Trees

Trees—especially young or newly planted ones—need special attention during low rainfall or drought. Their roots extend well beyond the canopy, so watering only at the trunk won’t help.

  • Water in a wide ring at and beyond the dripline.
  • Apply water slowly so it soaks deeply into the root zone.
  • Mature trees may need a deep watering every 2–4 weeks during extended dry periods.

💡 KNOW HOW: Measuring How Much Water

If you’re watering with a sprinkler, you can place a straight‑sided container, such as a coffee can, within the spray pattern. The depth of water collected shows how much is reaching the soil over a given period. This method helps you understand whether your sprinkler is delivering enough moisture to penetrate the root zone.

To make sure your trees are getting the right amount of water during dry periods, it helps to measure how much you’re actually applying. One easy way is to check your hose’s flow rate using a five‑gallon bucket. Set the hose in the bucket and time how long it takes to fill. If it fills in five minutes, your hose is delivering about one gallon per minute, which lets you estimate how long you need to run it to reach your target volume for a deep soak.

Some gardeners prefer tools designed for slow, steady watering. Slow‑release watering bags and drip rings apply water gradually and directly to the root area, which is especially helpful for newly planted trees that need consistent moisture to establish.

As a general guideline, newly planted trees benefit from about ten gallons of water per week applied slowly enough to soak deeply. Larger, established trees may need more, and a common rule of thumb is to provide roughly twenty gallons of water per inch of trunk diameter measured at breast height. No matter the method, applying water slowly helps it soak into the soil rather than running off, and a layer of mulch around the base helps the soil retain moisture and keeps roots cooler during hot weather.


☀️ IT'S THE GROWING SEASON ðŸŒ¿ 


Interested in herbs? Looking for a gift?
Perfect for a hostess gift, or birthday or housewarming.

 Check out the Herb Sampler on this Blog  

The Second Edition Herb Sampler (2019) is available through Amazon. 

Just click this link to find it.


Monday, September 23, 2024

GROWING MILKWEED


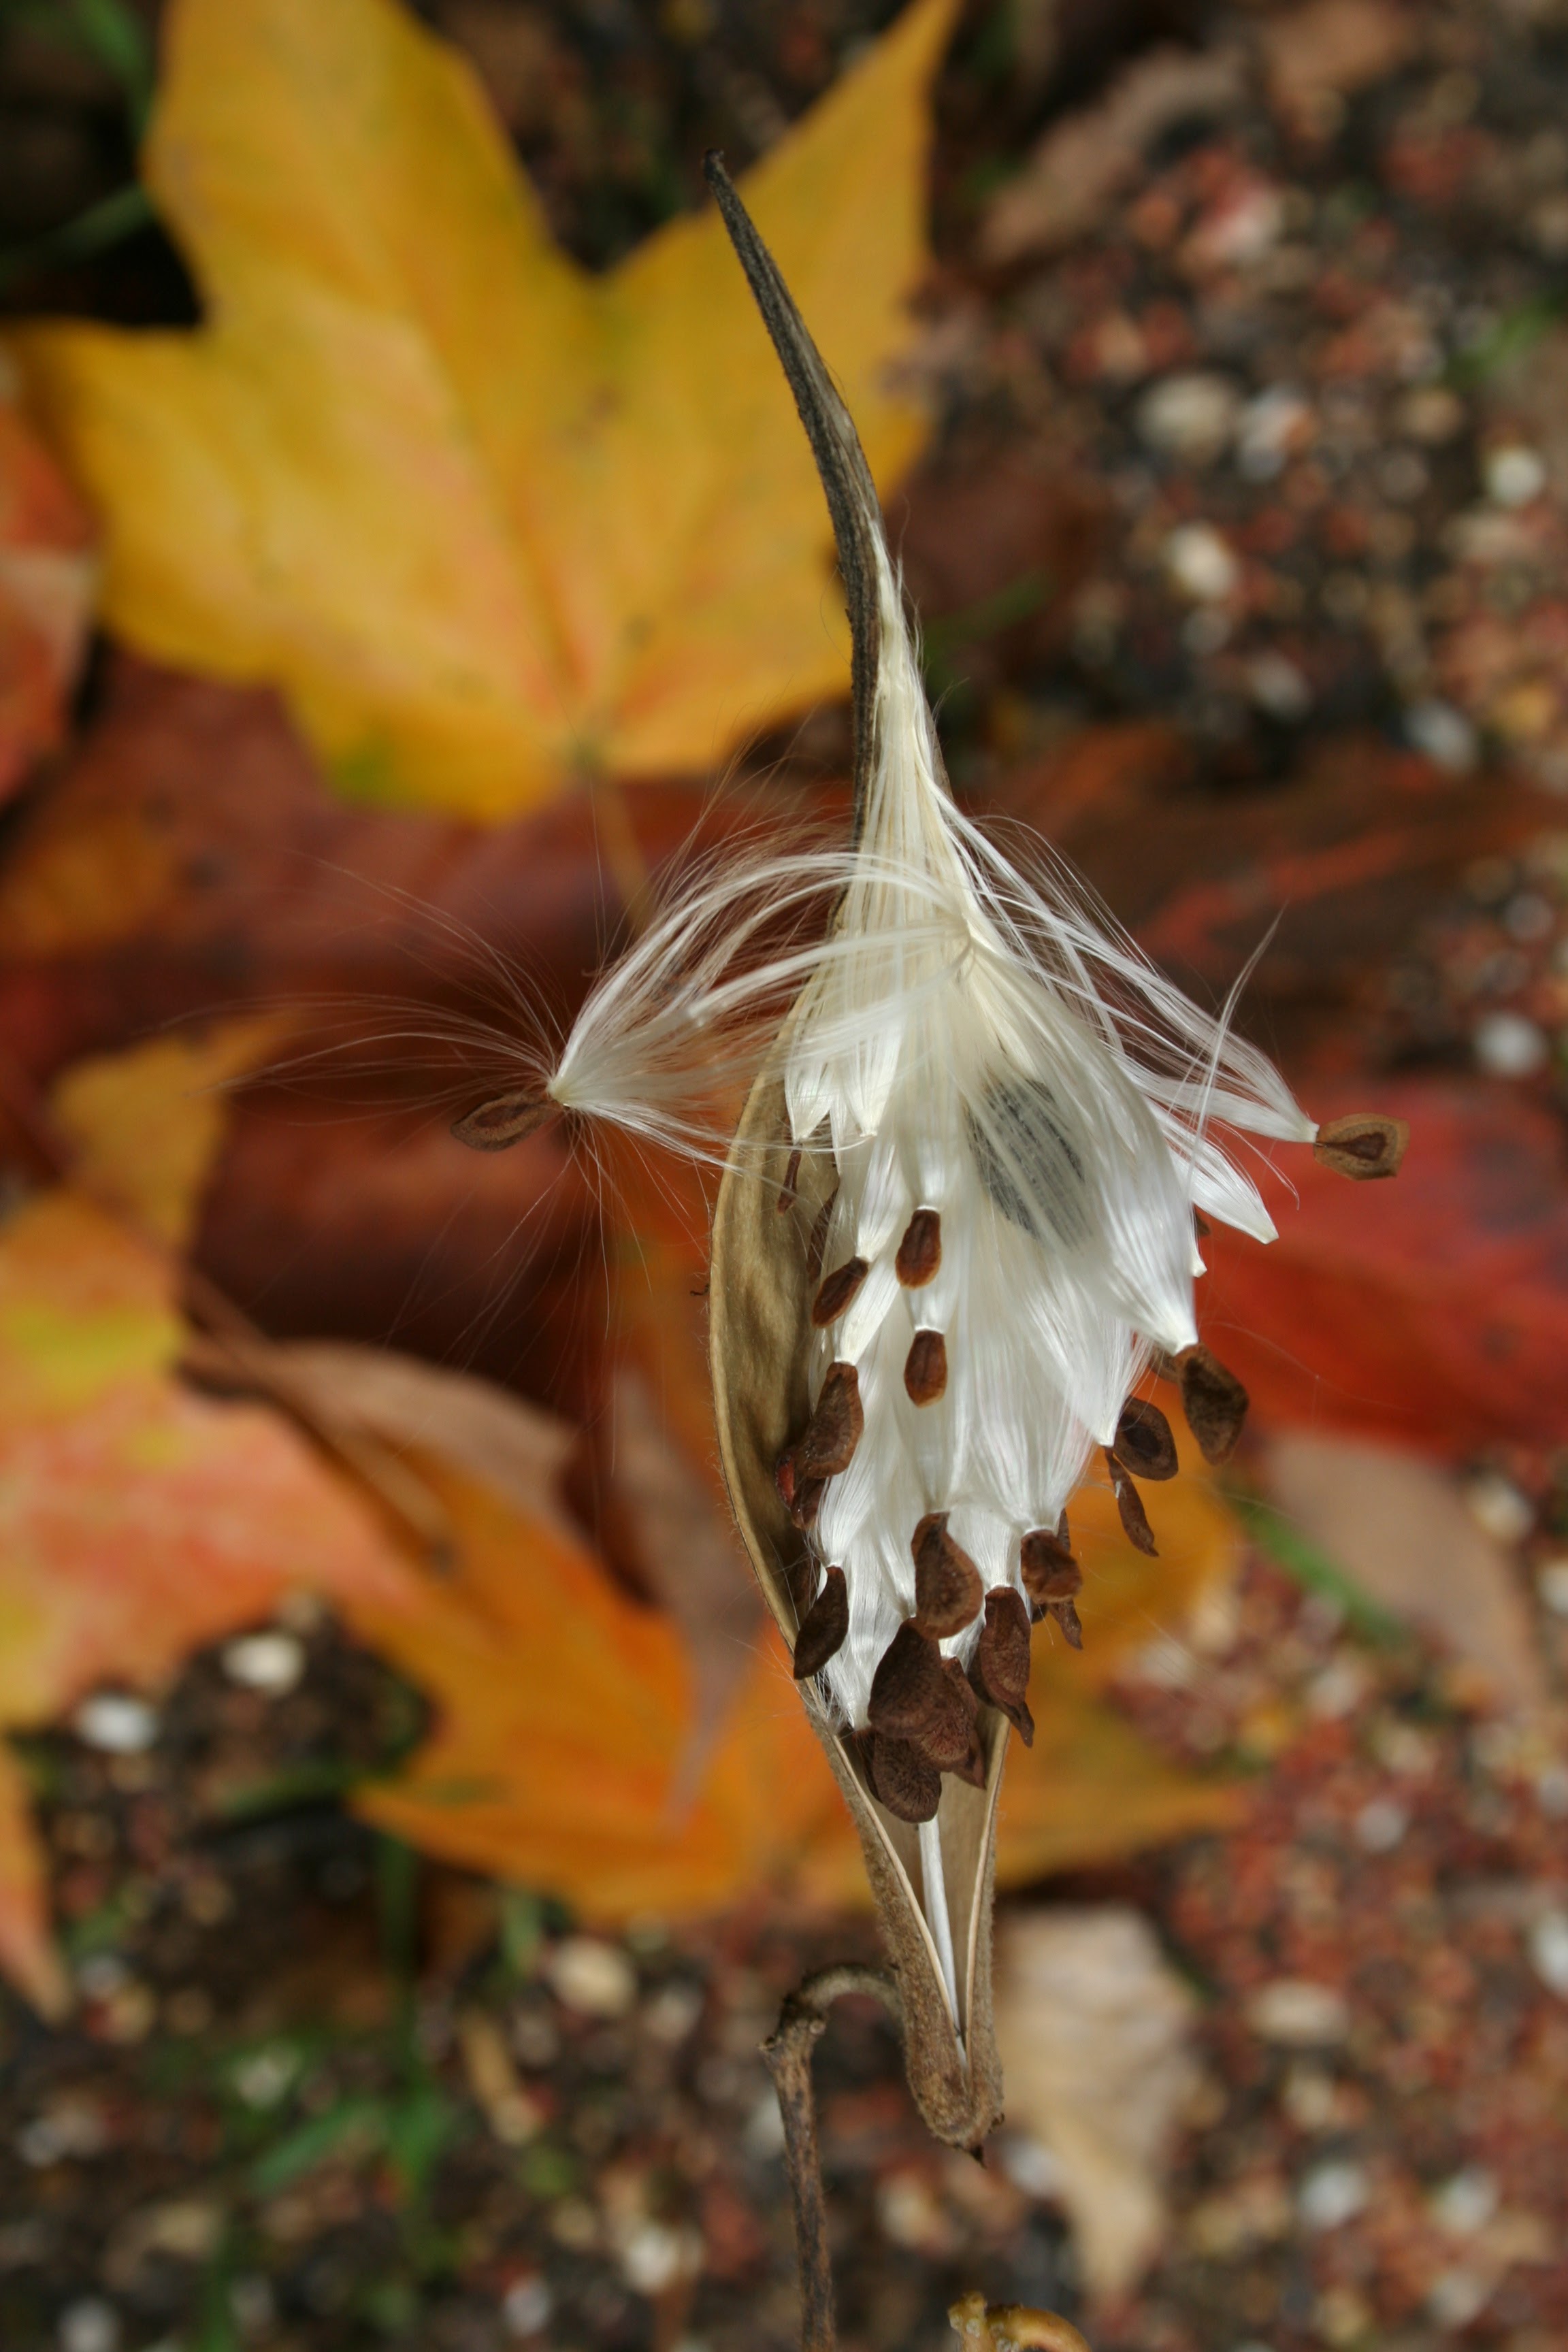
Butterfly Weed seeds (Asclepias tuberosa) Photo -C. Kagan

There are many different milkweed plants. They are in the Genus Asclepias. In Pennsylvania the most common species are Swamp Milkweed (A. incarnata), Butterfly Weed (A. Tuberosa), and Common Milkweed (A. syriaca). Check out this Penn State page for more information about these plants. 

Milkweed seeds require cold stratification. Here's what that means. In nature milkweed plants scatter their seeds in late autumn when the coming cold would kill any seedlings that germinated. Milkweed seeds are programmed to delay germination. Exposure to winter temperatures soften or crack their hard outer shells. In late spring, as temperatures rise, their dormancy is broken and they will start to germinate. Many species of milkweed are quite easy to grow from seed.

Harvesting your seed

You will find milkweed seeds in the pod, also called a follicle. They are attached to white, silky, filament-like hairs known as the coma (coh-ma). As the follicles ripen and split open in the fall, the seeds are revealed on the inside of the follicle. If not harvested, the coma will help seeds be wind-blown to scatter in a wide area.

Seeds will need to be separated from from the coma. Here’s a great tip from Kitty Mao (posted on The Beautiful Monarch FB page October 2017):

“My ‘Low-tech’ Milkweed seed separator: I dislike having special one-time-use gadgets, so I wanted to pass this idea along. You'll need 4 or 5 nickels (coins), a wide-mouth Ball jar with the metal rim, an old onion plastic net and a container to catch the seeds. Throw a couple handfuls of loosened fluff/seed pods in the jar with the coins, double up the net on top of the jar to ensure you have some smaller holes, screw on the lid, then turn upside down and shake out the seeds. Repeat as necessary. (It took me 5 minutes to collect my things and shake out 1/2 cup of Common Milkweed seeds...less time than this post!)”

Fall Planting in the Garden: Many species of milkweed are quite easy to grow from seed. Head outside in the autumn, or even in the early winter. Separate the seeds from the coma and sprinkle the seeds around the garden. Burying the seeds can reduce germination rates since milkweed seeds need light to germinate. Just drop the seeds in the garden and press them down with your hand. Once you've sprinkled the seeds over the soil there's nothing else to do but wait.

In spring, they'll germinate and begin to grow. Be sure the new plants stay well-watered until they're established. Milkweeds are hardy plants that will survive with very little care. Once the seedlings are a few inches tall, you can transplant them to different areas of the garden. [If you want to transplant, move them before they get too big as the root system starts to dig in early.] (Penn State Extension)

Spring Seed Starting: If you want to start seeds in the spring, separate them from the coma and store them in a cool area before until you are ready to cold stratify them to copy the nature process as noted above.

In February, carefully place seeds between moist paper towels to be refrigerated for 3-6 weeks before planting. At that time they can be planted. Peat pots make transplanting later easier. Prepare the pot and and gently water until damp. Place a few seeds on top and gently press down with your finger as they need light to germinate. Water gently, as needed, from the bottom. To prevent fungus, don't overwater. They should sprout in about 10-15 days.

Put your pots in a sunny window, greenhouse, or under a grow light. These should germinate and sprout within 10-15 days after planting. Plant out in the garden after last freeze date. It is best to transplant milkweed in the spring when the plant is small. Transplant on a day that is cloudy or during the cooler morning/evening hours. This will make it less stressful on the plant.


Winter Sowing - Outdoor Germination: Winter sowing is planting seeds outdoors in a protected container during winter. The container remains outdoors until the seedlings emerge in the spring.

The best time to winter sow perennials and annuals is generally December to March depending on the weather conditions in your area. These seeds receive a consistent period of moist, cold temperatures before germination occurs in spring. This is ideal for milkweed seeds.

Remember, when you place the seeds in the containers, they need light to germinate.


Carol Kagan, Master Gardener


Other Resources from Save Our Monarch Organization

Save Our Monarchs Organization has detailed information on growing milkweed seeds indoors.
Save Our Monarchs - Part 1 - outdoor direct sowing and prep for winter sowing-
Save Our Monarchs - Part 2 - planting milkweed outside/ winter sowing step by step- Remember they need light to germinate when you place the seeds on the soil.

~ ~ ~ ~

HERB SAMPLER Second Edition

Buy one for yourself and consider getting a few more as the winter holidays approach – hostess gifts, housewarming and holiday presents.

The Second Edition Herb Sampler (2019) available through Amazon. 


I Write: The Distance Between Us

At our monthly Writing is Fun meetings we decide a prompt for writing for the next meeting. Length is set at 2 pages so we can read them at ...