Showing posts with label spring. Show all posts

Friday, September 2, 2022

Trick Bulbs Now for Winter Treats


Before you start sewing sequins on the princess costume or the "S" on Superman's chest in preparation for the chanting of "Trick or Treat," think about one or more winter treats for yourself because now is the time.

What treats? Beautiful blooms from bulbs which have been made to blossom. Winter is coming and enjoying a bright flower inside while it is gray, cold, and icy can bring forth a “Bah, humbug to you, Old Man Winter!”

While many know this process as forcing bulbs, Art Wolk, award-winning flower exhibitioner and author of books on this topic, likes to call it bulb enticing. Whatever term you use, it refers to making a plant bloom ahead of its natural schedule.
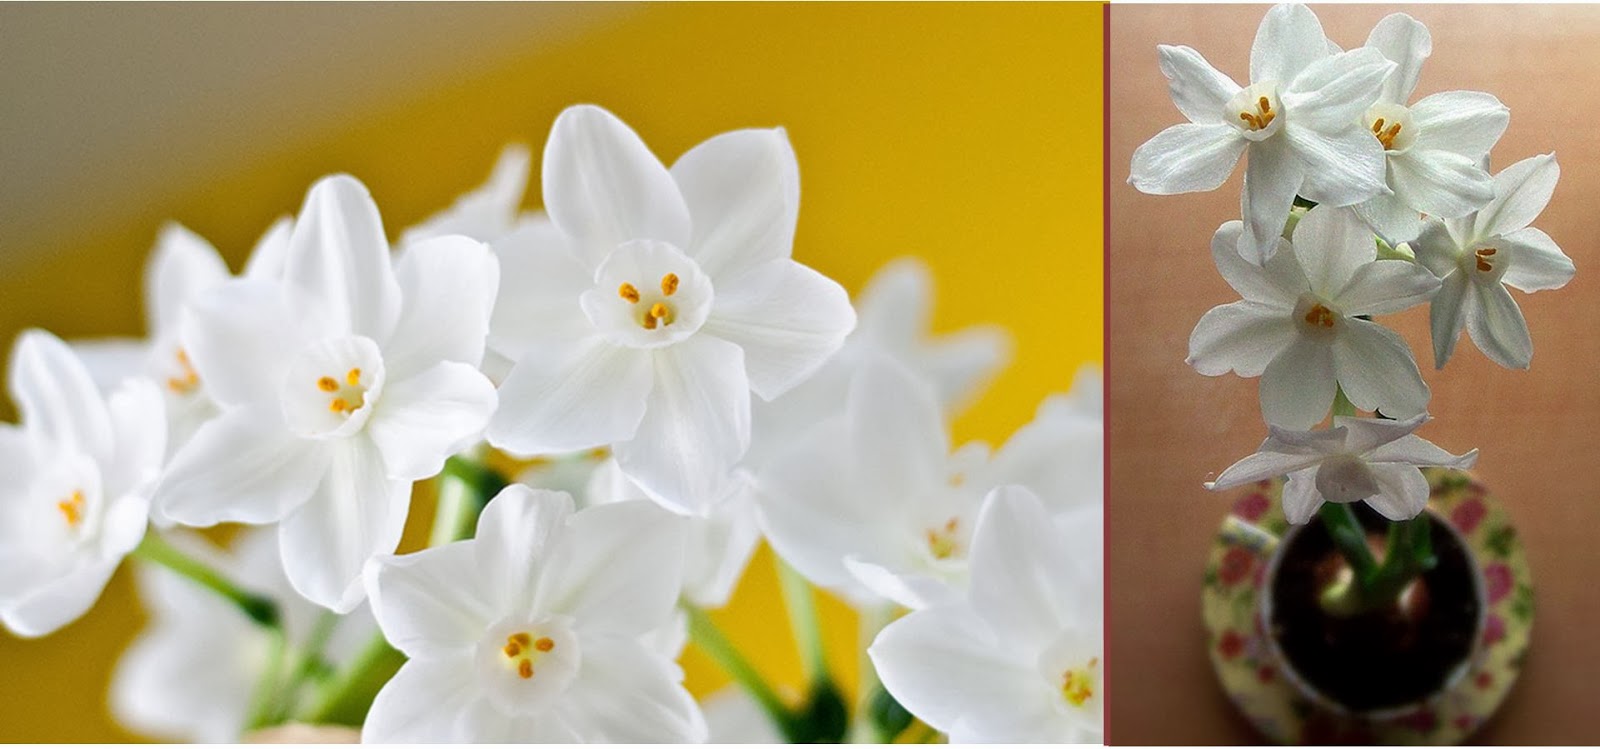
Paperwhite Narcissus (L: Clara S. & R: Debra B.)
What and When to Plant
Often for sale as kits this time of the year, paperwhite narcissus and amaryllis are the easiest for beginners. Dr. Robert Nuss, Penn State horticulturist, explains that these bulbs have been prepared for flowering before they are ready for sale.

Red Amaryllis (Univ. of Minnesota Extension Service)
Other spring-blooming bulbs such as crocus, tulips, daffodils, and iris are popular. Don’t overlook smaller bulbs such as snowdrops or grape hyacinths for a winter treat. A container-grouping of them is convenient for the breakfast table or corner of a desk. All these bulbs must have a cold period (35-48° F) of about three months to initiate bloom according to Kate DeSimone, Penn State Master Gardener.


Typically, bulbs you want to bloom during the end of year holidays are planted the last week in September; however, bulbs planted later will still bloom during the gray days of winter. Consider planting several batches several weeks apart for continual bloom in the future.


Pink Hyacinths (Tomy Lees)


So, if you want to see Dutch hyacinths in February, plant them around mid-November allowing 11 weeks to chill. Shoots should start to emerge the first week in February. The chart below shows the chill period for commonly grown bulbs.


Chill Chart (George Weigel)
How to Plant for Cool Storage

Bulbs can be grown in soil, a pebble filled bowl, or in water in a specially shaped bulb vase. To grow in soil, use a clean container with good drainage. Don’t use garden soil. Use a mix that drains well such as a mix of soil, sphagnum moss and perlite or commercial “soil-less mix.
Planting a pot (Iowa State Univ. Extension Service)

Fill the container three-quarters with the mix and sit the bulbs close to each other, root end down. If the bulbs have flat sides, turn these to the outside of the pot as that is where the largest leaf will come up. Add soil mix around the bulbs leaving the “noses” exposed. Water gently but thoroughly. Don’t let the soil dry out but don’t overwater.
 
If you are going to plant them in a pebble filled bowl (with water) or a bulb vase, you can pre-chill the bulbs in an open paper bag until roots begin to show. Then place them in the container and continue to chill for the remaining chill period, gently replacing the water every few days with lukewarm water. Check the Purdue Website for instructions on forcing bulbs in water.

Pebbles or glass vase with water (Purdue Ext. Serv.)

 Paperwhites have a tendency to flop over so you might want to put them in a tall glass container, clear to see the roots or fill with shells or other objects.

North Carolina State Extension Service (Michelle Pham)

 
Simone adds that bulbs may be chilled in any cold, dry location such as an unheated garage or crawlspace with temperatures around 40° F. If storing in the refrigerator, don't store in the same cooler as fruits or vegetables, which give off ethylene gas that can harm the flower inside the bulb. Some bulbs are poisonous, so don't put them in the refrigerator if you have small children.

Bring in the Blooms

When the chilling period is over, gently remove a bulb to check its growth. When you see roots and about 2 inches of shoot growth, the pots are ready to bring into the light.
Bring the pots into a cool location (55-65° F) with good sunlight. Keep the soil moist and turn the pots slightly each day to get uniform growth. Flowers should bloom within 2-3 weeks. To extend the blooms, keep them away from heat sources and move them to a cool area at the end of the day, bringing out for display in the morning.

Amaryllis (La Fattina)

Enjoy the treat of spring color during the dreary days of winter as you read through your garden catalogues. When the bloom is over, bulbs are usually discarded since forcing uses up their energy reserves so use their inspiration when planning the spring garden.

~ Carol Kagan, Master Gardener
#     #     #
Interested in herbs? Looking for Gardening Gifts?

 Check out the Herb Sampler on this Blog  

SPECIAL Price reduction.

The Second Edition Herb Sampler (2019) is available through Amazon. 

Just click this link to find it.

Sunday, October 10, 2021

Plan Now for Spring Color

From Franklin County, PA Master Gardener Facebook Notes

It’s hard to imagine next spring but try to remember the one earlier this year. Arching forsythia branches covered with yellow flowers, full blooms of mountain laurel, chenille-like branches of flowers on the red bud trees and sweet smelling lilacs. But the first blooms foretelling spring are the blooms of bulbs - tiny snowdrops (Galanthus) and the bright yellows and purples of snow crocus (Crocus chrysanthus) here and there.

It’s time to plan your spring colors and the best bets for bright colors and interesting shapes are bulbs. Planted in the fall they will burst into color just when winter is beginning to fade.

Optimum planting time for spring flowers falls between Sept. 15 and Nov. 30 in Pennsylvania. "It’s easy to plant spring flowers, and …they last for years,” said Jim Sellmer, professor of horticulture in Penn State’s College of Agricultural Sciences. As long as the ground is still soft enough to dig in, bulbs can be planted anytime in the fall.

Look over your garden and landscape for areas that will be bare in spring or areas that can use a pop of color. Don’t overlook shady areas in the fall. Once the leaves are off the trees they may be a sunny space in the spring. Remember that once the blooms have faded the foliage will still be standing. Select a spot where mid- to late spring plants can camouflage the foliage as it begins to fade.

Snow crocus (Crocus chrysanthus)
As always, consider whether you will need a soil test for areas where you are going to plant. Your county Extension Office can provide a soil test kit. Robert Berghage, associate professor of horticulture in Penn State’s College of Agricultural Sciences, provided information about soil needs for bulbs in a November 2000 article.

He noted that bulbs “need good drainage and a high amount of organic matter, so if your soil is mostly sand or clay, mix in peat moss or compost until organic matter is about 25 percent of volume.”

Both Sellmer and Berghage suggest using hardware cloth (chicken wire) when planting if rodents such as chipmunks and squirrels are a problem. You can surround the bulbs with a cage or spread the wire over the top of the soil and cover with mulch.

Spring-flowering bulbs are available from garden centers and catalogs from August to October. "They're easy to plant and live for years," said Berghage. "Best of all, they start brightening the landscape while it's still late winter."

The flowers of bulbs with their wide variety of bloom times can provide a continuous show of color from February through early summer. Early bloomers are Galanthus, or snow drops, which show up in late January. A variety of crocuses start to appear in February and include large flowered Dutch crocuses which can be seen with the star-shaped Glory of the Snow (Chionodoxa) and the deep blue flowered Squill (Scilla).

In March and April look for Grecian windflowers (Anemone blanda) which look a bit like asters and come in purple, pink or white colors. A wide swath of grape hyacinth (Muscari) in dark or light blue colors can resemble a small streamlet and can highlight along a pathway or down a sloped area. Another favorite is Dwarf Iris (Iris reticulate), a 4-6” tall plant that blooms in early spring. Consider planting Narcissus 'Tete-a-Tete" (Cyclamineus daffodil) dwarf daffodils, too.

Tete-a-Tete daffodils


There are many different types of tulips available from tall to short, fringed and cupped, peony-flowering and double-flowering. They are available in almost every color you can image, even striped. Although called a Checkered Tulip the Fritillaria meleagris is a most unusual flower with checkered petals.

Once the flowers bloom, Sellner notes, “It is important to let the foliage die completely before you remove it so that it can gather nutrients for growth during the next season.” He notes that once they have been planted correctly they don’t require much attention.

Photos: Carol Kagan

~ Carol Kagan, Franklin County Master Gardener

**********

Are you interested herbs? Check out the Herb Sampler on this Blog  

The Second Edition Herb Sampler (2019) is available through Amazon.


Tuesday, April 6, 2021

Spring Tree Planting Tips


[A NOTE from our Master Gardener Facebook page written by Annette MaCoy, Master Gardener Coordinator.]

This spring, you may be spending more time at home and in your garden than you expected. Perhaps you’ve decided that, along with the Victory Garden you’re planting for fresh and healthy produce, you’d like to plant a tree in your landscape for shade and beauty.

Many local nurseries and garden centers are still open during the Covid-19 shutdown, but before leaving home, be sure to call the business first to check on its status and hours of operation, which may be limited or modified.

[Tim Abbey, Extension Education says "During my twenty-four year career, the most common tree problem that I encounter isn't an insect or a disease—it is us." See his tips for Successful Planting.]

Do you know the right way to plant a tree? You might be surprised to find that it’s not what you thought. Consider the following statements – true or false?

It pays to Plant with Care.

All these statements are false, and yet all are often repeated as time-honored tradition. Research as proven otherwise. If you want a tree to survive and thrive, follow these suggestions instead.

Smaller trees – up to about 6 feet in height or up to about 1-inch caliper – are much easier to transplant and will re-establish much more quickly than a larger tree in a small container, which is likely to have a very poor root system. A larger tree may suffer transplant shock for 5-10 years, during which time a smaller tree will have surpassed it in growth rate and size.

Use your shovel handle and lay it across the grade. (Photo: joegarden.com)

Planting Hole - Dig a shallow hole that is 2 to 5 times wider than the root ball. You must find the root flare first; then dig the hole only deep enough to position the root flare at or slightly above soil grade. The root flare is that widening of the trunk at its base to join the roots; it may be buried or hidden within the container mix or ball of soil. An easy way to know if your hole is at the right depth is to take your shovel handle and lay it across the grade. The top of the root ball or tree flare should be at or above the handle level.  The root mass should be resting on undisturbed soil, and your planting hole should be a wide, shallow bowl, not a deep narrow cup.

Roots - Do give the roots a “bad hair day”! It is important to loosen and examine the roots of a container-grown or balled-and-burlapped tree before planting. Kinked, girdling, damaged, defective, and very long roots should be trimmed. This does not harm the plant; it will encourage the growth of healthy new roots and may prevent the future problems of a poor root system. When working with roots, always keep them moist and shaded. If possible, remove excess amounts of the container medium in which the tree was growing – whether it’s the soilless mix of a container or the heavy clay soil of a balled plant – to facilitate root contact with the backfill soil in the planting hole. All twine, and as much burlap and wire as possible, should be removed from a balled plant.

(Photo: Univ.Maryland)

Soil - In average garden soil, do not amend the backfill soil with organic matter. Loosen it and break up large clumps before backfilling around the roots. If the soil is extremely poor, mix up to 10% by volume of organic matter into the backfill. Amending the backfill soil with copious amounts of organic matter (compost, manure, or peat moss, for instance) changes its texture, which makes it very difficult for the roots to grow beyond the planting hole. A strong tree will have roots spreading outward into native soil, not circling within amended backfill soil.


Mulch
- Do not mound mulch up around the trunk of a tree. This is called a “mulch volcano,” and we all know that trees don’t grow in volcanoes. Mulch should be applied in a thin flat layer, 2 to 4 inches thick, spread over as much of the root zone under the tree’s canopy as you can manage, with an area left bare directly around the tree’s trunk. Mulch piled right against the trunk keeps the bark moist, which can lead to insect and disease problems; it also provides habitat for nibbling animals such as mice and voles, and can lead to girdling roots by interfering with oxygen and water absorption by the roots.

Pruning - Newly planted trees should not be pruned to ‘balance’ the crown and roots. The leaf canopy provides energy to the roots to help them begin growing. Pruning stimulates the tree to expend energy on new top growth at the expense of root growth. The only pruning that should be done at planting is to remove broken, dead, or defective branches. Give roots at least one year to become established before pruning the tree for structure.

Once your tree is properly planted, continue to keep it watered (moist but not saturated soil throughout the root zone) for at least the first year after transplanting. These guidelines, more than any transplant potions or outdated advice, will ensure a healthy tree for future generations.

~ Annette MaCoy, Penn State Extension, Franklin County

**********

Are you interested herbs? Check out the Herb Sampler on this Blog  

The Second Edition Herb Sampler (2019) is available through Amazon.


Tuesday, March 30, 2021

Spring Garden Tips


We had a few mild days and started either thinking about working in the garden or actually doing some chores. Here are some tips for Spring.

Survey the garden and landscape. An important part of planning is having information about your garden.  Note what light is available – full sun for 6 or more hours each day during the growing season, part sun/shade, and full shade. For some plants it is important to know if the site is wet or dry. Make note of what bulbs and perennials need to be divided.

Get your seeds! Last year there was a seed slam as gardening interest exploded during lockdown. Whether you order seeds or go to the garden center, look over your plans and get your seeds now. Look for plants that are listed for Zone 6b, the Franklin County USDA Hardiness Zone. Hardiness zones are areas with the same temperature - the coldest zone is 1 and the warmest is 10.

Sow any seeds you plan to start indoors. This will give you about 6 weeks before the last threat of a late frost (average is May 12 in Franklin County) and planting outside. Penn State’s Seed Starting Demystified article has good information.
 
Get a soil test. Since garden soil is the container for your plants, have it analyzed through Penn State. They are available for $9 at the Extension Office, 181 Franklin Farm Lane, Chambersburg (8:30-4:30 M-F). Find out if the soil needs amended and, if so, what it needs. Soil tests information.

Buying plants. Often the plants we want, especially annuals, are already out at the nurseries even though it is too early to plant them; however, later the selection will be small. If you buy them ahead of time you will need to babysit them until May.

Tune-up your tools. Shovels, spades, trowels, hoes, pruning shears, loppers, and hedge clippers should be sharpened. Clean garden tools now and after each use. Check for loose handles or screws. Make sure there is easy access storage for the garden season.

Do garden clean-up. Perennials and grasses left standing can be cleared. Remove fallen leaves over spring bulbs so that sun can reach the emerging foliage. Remove mulch from roses, azaleas, and other tender shrubs. Be prepared to recover if a cold-snap hits.

Prune dead and damaged branches from trees and shrubs. Prune only what you can reach. Leave big tree pruning to professionals.  Delay pruning spring-flowering trees and shrubs until after they have bloomed. For example, do not prune forsythia until after it has bloomed.

Plant cool season crops. Once clean-up is done, and before working in the garden, make sure the soil is not wet. Working soil when it is wet destroys soil structure and causes compaction. When the garden is dry enough (feels crumbly like chocolate cake), it is planting time. Cool season vegetables such as peas, onions, shallots, leeks, salad greens, cabbage and broccoli be planted. Some are available as transplants and other seed-sown. Penn State Extension has a list of planting dates for common garden vegetables. 

Check your soil temperature. Plants are sensitive to temperature below ground, too. Use a soil or meat thermometer and take the temperature at 2-3” deep around 11 a.m. Try to get readings over a period of four to five days. Transplant local warm season crops at 60° to 65° F. These include tomatoes, peppers, cucumbers, cantaloupes, watermelons, pumpkins and squash. A daily soil temperature reading is available for Franklin County from Cornell University.  More on soil temperature at Garden and Life Notes.

CKagan, Master Gardener

**********

ARE YOU INTERESTED IN HERBS?

My book, the Second Edition Herb Sampler (2019), is available through Amazon.
Check out the new Spring Sale price. 

 More information about the Herb Sampler on this Blog  


Sunday, January 31, 2021

Master Gardener Calendar - Pictures - Spring Reminder


HELLO MASTER GARDENERS! 

Taking pictures for the Master Gardener 2022 Calendar? Below are the guidelines.

Don't forget winter photos or the first blooms, buds and shoots of spring. 

Here are the guidelines.

Files should be 2 Mbs (6 mp on phones is 18 Mbs) or larger. Most cell phone photos are good. See Smartphone camera tips at the bottom.

A resolution of 300 dpi and a minimum size of 5"x7"

Try to include action photos.

If a MG is in the picture they should be wearing MG branded clothes.

Identifiable children need a parental release.

No staged photos - real interactions with the public. [Prob not much of this...)

Tips for using your Smartphone camera

1. Shoot in Landscape

- Rotating your phone to landscape mode and using the volume buttons to take the photo provides a more stable hold on the phone, reducing noise in your pictures.

2, Utilize the Grid Lines

- Locate this option in your photo app settings.  Keep your main subjects off center so they become the focus.

Focus on the eyes
Place strong lines and divisions like the horizon on the gridlines

3. Don’t Zoom!

- Get up and personal with your subject for the best results.  Most smartphone cameras have a digital zoom, but using this won’t help you get detailed pictures from far away.  Zoom is just essentially cropping our picture on the screen.

4, Choose different or unusual camera angles

- This allows you to explore different point of view.

Lie on your stomach
When taking pictures of small children or pets, get down on their level.
Climb up and look down!

5. No Garbage Cans!

- You should also avoid cluttered or ugly backgrounds by changing your point of view.  Watch out for the trash cans or other unsightly objects in your view.

6. Multiple Shots

 - If you see something that catches your eye don't just take one shot and hope for the best. The chances of getting a good photo with your first shot are very slim. You should take shots from various angles and distances.

#     #     #

Interested in herbs? Looking for Gardening Gifts?

 Check out the Herb Sampler on this Blog  

SPECIAL Price reduction.

The Second Edition Herb Sampler (2019) is available through Amazon. 

Just click this link to find it.


I Write: The Seam Ripper's Lesson

 At our monthly Writing is Fun meetings we decide a prompt for writing for the next meeting. Length is set at 2 pages so we can read them at...