Saturday, October 30, 2021

Fall Pruning


Photo by Karen Knuepfer

***Fall Pruning…Simple, right?

An article by York County Master Gardener Karen Knuepfer, posted October 2021

(Put here to find it later😊)

Ahhhh, September…
There is something about the cooler temperatures, the crisper mornings, the generally softer air and bluer skies that just promises the delights of Fall. And, gets many the gardener itching to put away the summer garden and prepare his/her grounds for the next growing season. Let the Great Clean-Up commence! For many, that includes grabbing the pruning shears to…Tidy Up.
WHOA, Nellie, or Ned! Not so fast! While it may “make sense” to clean up the whole darned mess, in most cases, September/October is NOT the time to prune. To prune is to stimulate new growth. Fall is when plants in our region are actually trying to go dormant, to enter a state of temporary metabolic inactivity or very limited activity, basically suspended animation, during which plants conserve energy and protect themselves from the rigors of Winter’s frigid temperatures and conditions. Plants know when to hunker down and save their reserves. If pruning encourages new growth just when a plant is slowing down, that new growth may be doomed; the plant will certainly be stressed and thereby weakened just when that new growth does not have time to harden off before the first frost.


So, Nellie or Ned…take a deep breath and put away the pruning shears for at least a couple of months. Use your gardener energy to rake up dead leaves, [Do you need to rake up leaves?] mulch your beds (using those dead leaves!), commit those dead annuals and vegetables to the compost heap. That being said, certainly this is the time to inspect for and remove dead or dying diseased plants (blackened stems, withered leaves, spotted foliage may be indicators); cutting back with the pruners may be appropriate in this case and trash or burn the removed plants rather than composting. No sense incubating a disease. Prune back or cut down dead limbs or branches, too. No sense in risking injury or damage due to flying debris in a Winter wind.
Actually, the better time for true pruning is during that Thanksgiving-to-New Year period of Winter or Early Spring. Certainly some time after several hard frosts is optimal. Pruning creates a wound that the plant must seal; pruning before the plant’s natural spring growth spurt will allow the wound to seal and heal faster. Choose clear, dry days to work. Cool temperatures provide less stress to a pruned plant and dry conditions reduce the growth of microbes that can lead to disease which may undo the benefits of your hard work. Focus on removing dead or dying branches, crossing branches which may rub (cut the smaller branch off), and vertical growth or suckers (cut as close to the base of the growth as possible). The general benefit of good pruning is to provide more air circulation and light throughout the plant, yielding more flowers and fruit for flowering plants, shrubs and fruit trees, and healthier canopy for non-bloomers.

Other thoughts regarding To Prune or Not to Prune:
Crape myrtle with seed pods reaches to the sky.
Many perennials and native plants (think yarrow, cone flower and agastache) and ornamental grasses are gorgeous in the Winter, even in their dry, dormant states. They provide textural interest in the Winter garden, as well as shelter and food for birds, insects and other wildlife. Mums can “come back” for years if left unpruned until Spring so their their roots are protected from the harsh Winter temperatures; and you will know where they are in your garden after the snows melt!
If you just have to get out and wield those pruning tools, be sure to wait until we’ve had a few hard frosts. This allows your perennials, for instance, to go fully dormant. Cut your plants back to 3” above the ground. Look for signs of disease and get rid of those sickly guys. Burn or discard what you remove. Your perennial beds will thank you in the Spring and Summer.
Shrubs are best pruned in late Winter or early Spring if they are non-blooming. The general rule of thumb for flowering shrubs is to prune immediately after blooming (think Azalea, Spirea). But it is important to know the difference between Spring bloomers that set their buds on old growth, such as oakleaf hydrangea: prune after blooming, and those that wait to set their buds on new growth, such as Annabelle or PG hydrangea: OK to prune in Winter. I admit, it can get confusing!
Deciduous shade trees like the oaks and lindens we have around York are best pruned in Winter. Their branching structure is easy to see without their crowns of leaves, so beneficial pruning will be more effective and confident. Some other shade trees like maples, birch and dogwood will produce a heavy flow of sap if pruned in the Winter – unsightly but not harmful. Nevertheless, you might want to wait until Summer when their leaves are fully expanded to shape up these “bleeders.”

[Cornell information sheet on pruning techniques and timing.]

Broadleaf evergreens like holly and magnolia generally need no pruning at all, while needleleaf evergreens, for instance, such as yews, junipers and firs are best pruned early in the growing season; take care not to cut back into the old bare wood which may not sprout new growth. Pine trees are best pruned during their “candle stage” growth spurt, but prune very gently, taking no more than half the “candle.”
Deciduous fruit trees, say apples, cherries and plums, are a whole other matter. Despite being Spring bloomers, selective pruning is best done mid-Winter. You will lose some flower buds but you will provide a more open growing environment, producing a better fruit crop.
When I chose to write about this simple topic: Pruning in the Fall, I truly had no idea how complex a subject I was taking on. Suffice it to say, you need to know your plants and need to proceed with some education and caution to be a happy and successful Pruner. Best practice: know your plants; use clean, sharp tools; be mindful of the calendar and the weather; and leave pruning in high places and near power lines to the professionals! If you are not sure what to do, check in with your local Extension office or the Master Gardener Hotline 717-840-7408; yorkmg@psu.edu; 2401 Pleasant Valley Road, #101, York PA 17402. And, know that the Fall Garden Clean-Up will probably be more than a one-weekend project.
Happy Fall, ya’ll!
(Photo by Karen Knuepfer)
Karen Knuepfer is a Master Gardener in York County. Penn State Master Gardeners are volunteers for Penn State Cooperative Extension.

Thursday, October 21, 2021

The Craighead House- Carlisle, PA


Craighead House (Courtesy of Comm. to Restore)

Recently I was alerted to the fact that the Cumberland County Master Gardeners, and other volunteers, are helping to maintain a pollinator garden at the Craighead House  in Carlisle, Pa. With the help of organizations such as Chesapeake Bay Foundation and the Yellow Breeches Watershed Association, plus other generous individuals, this property is being transformed into an educational center on nature, the environment, and local history. This month I visited the property and was pleasantly surprised by all the features there.

Pollinator Garden

The Craighead property includes the original house built in 1886, currently in restoration, property along the Yellow Breeches limestone stream, a popular fly-fishing spot, and grounds where nature thrives. From the 1800’s through the 1990's three well-known nature lovers spent time at the Craighead House -  twin brothers Frank Jr. and John plus their sister Jean Craighead George. Frank and John are best known for establishing falconry in the U.S. and their study of grizzly bears in Yellowstone National Park. Writing more than 100 children’s books related to nature, including Newberry Award winners Julie of the Wolves and My Side of the Mountain, Jean was cited as a Conservation Hero by the U.S. Fish and Wildlife Service.

Aster w/Clouded Yellow

From an article on the Cumberland County Master Gardener site: “The garden beds include a pollinator bed that was funded through the Chesapeake Bay Foundation and the Yellow Breeches Watershed Association. The beds are maintained by volunteers, several of whom are Master Gardeners. In 2021 Craighead House was approved as a Master Gardener demonstration site focusing on educating the public about pollinators, native plants, and invasive species.”

There were fall blooms in the garden and many pollinators visiting during our visit on October 15, 2021.  We were amazed at the size of the bees on the Mountain Mint  and the variety of bees, butterflies and other pollinators on the Aster flowers and Golden Rod. Native plants surround the house along the porch and around the property. The property looks like it might have when the family came for summers in the 1930’s.

In various places around the house area there are signs with information about pollinator plants, invasive plants and native plants. A springtime and summer visit will no doubt show blooms on many of the plants that are now going dormant. 

According to Gerald Almy, a trout fishing enthusiast, the Yellow Breeches is one of the four most hallowed limestone streams in  Pennsylvania for trout fishing. Worth noting is that Falling Spring in Franklin County is among them. Glancing out along the stream with autumn colors starting to show there was a man fly-fishing in the gently flowing water. There were a few benches placed along the banks facing the stream. A pleasant and calm resting spot. Boating or fishing can be accessed from the grounds at the far end of the parking lot.

Kitchen Wall (Courtesy of the Sentinel)

The house is being restored and I wandered around the wrap-around porch looking in windows. The kitchen area was filled with storage boxes but I noticed some drawing on the walls. My thought was that when it was abandoned it was visited and graffiti added. I was surprised to see the front door open so, after calling out, I ventured in. Rooms were empty of furniture and I went to the kitchen. WOW!

All the walls in the kitchen were covered with more than 250 drawings, paintings, cartoons, and doodles, in addition to some well-done art sketches. One of the dates is 1929 and others as recent as the 1970’s.  I discovered in the brochure that the artwork that was done by several generations of family and friends is being preserved during the restoration. Many are signed with a date or other identification. One local resident, Tom Benjay, has taken on the task of trying to identify the artists.

Shared by Ann Dailey "an interesting tidbit on the artwork in the kitchen: the first painting was done on a bit on a whim by one of the uncles in 1929 (the cats and mice around the stove pipe flu), but it started a 70 year Craighead tradition which ended in 1999 when the author Jean Craighead George and her son painted the last two animals on the only white space left.  It was the last time that the family got together at the house for her 80th birthday. Her famous brother, Frank, one of the naturalist twins, died in 2001."


Postcards for sale (Craighead House website)


An area created by local Eagle Scouts provides an area for the many community events held there along with programs and presentations highlighting nature topics. Storytimes with read aloud of Jean's nature picture books, interactive insect programs, and occasional community days with crafts, games, treats and interactive activity stations featuring owls, bats, "quill" craft, spider hunt and more are organized for the public.

The Craighead House is located at 318 East Old York Road, Carlisle, PA 17015.  Parking is available in the gravel parking lot located off Old York Road to the left of the house. The grounds are open daily to the public, free of charge, from dawn to dusk.

Photos: Carol Kagan except for Kitchen Wall & Craighead House & postcards

* * *

Interested in herbs? Looking for Holiday Gifts? 
Check out the Herb Sampler on this Blog  

The Second Edition Herb Sampler (2019) is available through Amazon.


Tuesday, October 19, 2021

It's Garlic Planting Time


 (From my Gardening Column in the Franklin County Free Press)

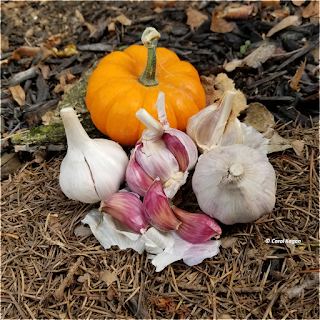
It’s garlic planting time - now until early November, before a local freeze. One bulb of garlic with 8 to 10 cloves will give you 8 to 10 bulbs next year. A fine return for your patience as garlic has a long growing season. Garlic takes 8 to 9 months to harvest so fall plantings won’t be ready until May or June next year. Fall is the best time to plant as it allows the roots to develop. You will be planting garlic cloves, the individual pieces from the garlic bulb.

There are two types of garlic – softneck and hardneck – the neck referring to the stem. Softneck types have a long shelf life, mild flavor, and their leafy stem makes them easy to braid. They are the ones most often stocked by grocery stores. Hardneck are recommended by Penn State for southern areas in the state.

1-Buy your bulbs from your local nursery, garden center, or mail order from catalogues. Remember when you buy that there are from 8 to 12 cloves per bulb but you will want to plant only the biggest.


2-Start in a small area with well-drained soil and a minimum of 6 hours of sun. It is important to prepare for future replanting as it needs at least two years or more to allow the soil to recover. Horticulturist Jessica Walliser shows how it might be grown in pots.

3-You will need to break the bulbs to get the cloves to plant. Don’t do this more than a day before planting as the root end will dry out making it have to get established. Sort the cloves keeping the biggest to plant.

4-Plant upright with the root nodule down about 2-4” into the soil, spacing them 4-6” apart. Leave 6” between rows.

5-Water them well for 3-4 days then mulch with 2-4” of straw or shredded leaves. For proper bulb formation, water weekly as needed and side dress with nitrogen rich fertilizers until the flower stalks (scapes) appear. Allow the soil to dry before you harvest. Check out this information from the  Allegheny Master Gardener program. 

6-Use a garden fork to lift a few bulbs to see if they are mature.


7-After harvesting, allow them to dry and harden in a shady, well-ventilated, shaded area for a few weeks. Brush away the dirt and trim the roots and tops within an inch of the bulb.

CKagan, Master Gardener

*     *     *

Interested in herbs? Looking for Holiday Gifts?
 Check out the Herb Sampler on this Blog  

The Second Edition Herb Sampler (2019) is available through Amazon.


Saturday, October 16, 2021

An Intelligent Murder of Crows

 BIRDS WITH AN ATTITUDE

It was very late. I couldn't get to sleep and began cruising COMCAST for something to watch and found a PBS Nature show, A Murder of Crows. I learned some fascinating things.

New research has shown that crows can make and use tools, can recognize 250 distinct calls, and not only can recognize human faces but can pass down, through generations, that recognition.

Crows are social birds that mate for life and raise their young for up to five years. And they learn from each other’s misfortunes. When one is killed in a farmer’s field, it’s not uncommon for them to change entire migratory patterns so that no crows fly over that field for as long as two years.

CROWS MAKE AND USE TOOLS: For example, they use twigs to pry insects from wood or from inside long slender flowers. Crows are shown (in the program) using twigs to obtain other twigs that would allow them to obtain food - sequential tool use. Using tools to act on non-food objects – for example, to make or retrieve other tools – is considered to be a hallmark of human intelligence.

Crow using a stick to get a longer stick to get some food

CROWS HAVE OVER 250 CALLS: Calls are complex and vary by species and also regionally, sort of crow dialects. Not only the call but the tone and level of sound change the meaning of vocalizations – loud when defending territory or hungry and quiet, almost purring, to show affection. Distress calls bring other crows to their aid, as crows will defend other crows not known to them.
Univ. of Seattle researchers don masks to test recognition

CROWS KNOW  WHO YOU ARE: Crows recognize individual human faces, and hold grudges against people who have been mean to them in the past. They have the ability to recognize individual human faces and pick them out of a crowd up to two years later. If a "dangerous face" is recognized by a crow, a call of warning is sent out among the crows. In a generation later,  the same face sends out caws of warning. Univ. of Washington researchers used masks in experiments that revealed that crows do not forget.

*     *     *

Interested herbs? Looking for Gifts? Check out the Herb Sampler on this Blog  

The Second Edition Herb Sampler (2019) is available through Amazon.


Sunday, October 10, 2021

Plan Now for Spring Color

From Franklin County, PA Master Gardener Facebook Notes

It’s hard to imagine next spring but try to remember the one earlier this year. Arching forsythia branches covered with yellow flowers, full blooms of mountain laurel, chenille-like branches of flowers on the red bud trees and sweet smelling lilacs. But the first blooms foretelling spring are the blooms of bulbs - tiny snowdrops (Galanthus) and the bright yellows and purples of snow crocus (Crocus chrysanthus) here and there.

It’s time to plan your spring colors and the best bets for bright colors and interesting shapes are bulbs. Planted in the fall they will burst into color just when winter is beginning to fade.

Optimum planting time for spring flowers falls between Sept. 15 and Nov. 30 in Pennsylvania. "It’s easy to plant spring flowers, and …they last for years,” said Jim Sellmer, professor of horticulture in Penn State’s College of Agricultural Sciences. As long as the ground is still soft enough to dig in, bulbs can be planted anytime in the fall.

Look over your garden and landscape for areas that will be bare in spring or areas that can use a pop of color. Don’t overlook shady areas in the fall. Once the leaves are off the trees they may be a sunny space in the spring. Remember that once the blooms have faded the foliage will still be standing. Select a spot where mid- to late spring plants can camouflage the foliage as it begins to fade.

Snow crocus (Crocus chrysanthus)
As always, consider whether you will need a soil test for areas where you are going to plant. Your county Extension Office can provide a soil test kit. Robert Berghage, associate professor of horticulture in Penn State’s College of Agricultural Sciences, provided information about soil needs for bulbs in a November 2000 article.

He noted that bulbs “need good drainage and a high amount of organic matter, so if your soil is mostly sand or clay, mix in peat moss or compost until organic matter is about 25 percent of volume.”

Both Sellmer and Berghage suggest using hardware cloth (chicken wire) when planting if rodents such as chipmunks and squirrels are a problem. You can surround the bulbs with a cage or spread the wire over the top of the soil and cover with mulch.

Spring-flowering bulbs are available from garden centers and catalogs from August to October. "They're easy to plant and live for years," said Berghage. "Best of all, they start brightening the landscape while it's still late winter."

The flowers of bulbs with their wide variety of bloom times can provide a continuous show of color from February through early summer. Early bloomers are Galanthus, or snow drops, which show up in late January. A variety of crocuses start to appear in February and include large flowered Dutch crocuses which can be seen with the star-shaped Glory of the Snow (Chionodoxa) and the deep blue flowered Squill (Scilla).

In March and April look for Grecian windflowers (Anemone blanda) which look a bit like asters and come in purple, pink or white colors. A wide swath of grape hyacinth (Muscari) in dark or light blue colors can resemble a small streamlet and can highlight along a pathway or down a sloped area. Another favorite is Dwarf Iris (Iris reticulate), a 4-6” tall plant that blooms in early spring. Consider planting Narcissus 'Tete-a-Tete" (Cyclamineus daffodil) dwarf daffodils, too.

Tete-a-Tete daffodils


There are many different types of tulips available from tall to short, fringed and cupped, peony-flowering and double-flowering. They are available in almost every color you can image, even striped. Although called a Checkered Tulip the Fritillaria meleagris is a most unusual flower with checkered petals.

Once the flowers bloom, Sellner notes, “It is important to let the foliage die completely before you remove it so that it can gather nutrients for growth during the next season.” He notes that once they have been planted correctly they don’t require much attention.

Photos: Carol Kagan

~ Carol Kagan, Franklin County Master Gardener

**********

Are you interested herbs? Check out the Herb Sampler on this Blog  

The Second Edition Herb Sampler (2019) is available through Amazon.


Sunday, September 5, 2021

Frost, Freeze and Green Tomatoes


From Franklin County, PA Master Gardener Facebook Notes (October 2013)

We are fast approaching the last frost free date of October 15 in Franklin County and many home gardeners, eager to either have homegrown tomatoes for Thanksgiving or loath to discard any possible foodstuff, are looking at their green tomatoes.

FROST VS. FREEZE

Frost,“ killing frost,” freeze warnings, a “killing freeze” - what is the difference? In casual conversation the terms frost and freeze are often interchangeable but there is a very real difference. Frost and freeze are two distinct phenomena. These terms take on significance when they are associated with the growing season.

FROST

According to the National Oceanic and Atmospheric Administration (NOAA), frost is the formation of thin ice crystals on the ground or other surfaces in the form of scales, needles, feathers, or fans. Frost develops under conditions similar to dew, except the temperatures of the Earth's surface and earthbound objects falls below 32°F. A frost advisory is issued when widespread frost formation is expected over an extensive area. Surface temperatures are usually in the mid-30’s. If a frost period is sufficiently severe to end the growing season (or delay its beginning), it is commonly referred to as a "killing frost."


Dr. Katharine B. Perry, North Carolina Extension Service, has compared frost and freeze conditions for protection of horticultural crops noting frost and freeze protection methods are based on preventing or replacing radiant heat loss.

Because frost is primarily an event that occurs as the result of radiational cooling - heat loss at night - it frequently occurs with a thermometer temperature in the mid-30’s. A radiation frost happens when a clear sky and calm winds (less than 5 mph) allow an inversion to develop. An inversion occurs when the heat radiating from the earth rises and causes the cooler air above to be pushed down, and temperatures near the surface drop below freezing.

Covering plants before the sun sets may be protection from frost as this can help retain heat near the plants.

 FREEZE

According to NOAA, a freeze is when the surface air temperature is expected to be 32° F or below over a widespread area for a significant period of time. Use of the term is usually restricted to advective situations or to occasions when wind or other conditions prevent frost.

Dr. Perry explains than an advective, or windborne, freeze occurs when a cold air mass moves into an area bringing freezing temperatures. Wind speeds are usually above 5 mph and clouds may be present. Attempts to protect plants are very limited under these conditions.

A "killing freeze" may be used during the growing season when the temperature is expected to be low enough for a sufficient duration to kill all but the hardiest herbaceous crops.

According to NOAA, freeze warning are issued during the growing season when surface temperatures are expected to drop below freezing over a large area for an extended period of time, regardless whether or not frost develops.

GREEN TOMATOES

We are closing in on the first average frost. (Check the date for your area.) Since it takes about six weeks for a tomato to go from flower blossom to ripe fruit, you should have pruned or pinched back your tomato plants in early-to-mid-September (cutting the growing tip off all the vines and any new blossoms to redirect the plant’s energy toward ripening up the existing fruit).

Oops! Okay, you were enjoying the weather and forgot. Now what? There's always fried green tomatoes or you can store them to ripen up later.

Kansas State also suggests roasting them for eating warm or cold, using in side dishes or freezing in small batches to use throughout the winter.

HARVEST AND STORE TO RIPEN

Pick and store your mature green tomatoes and let them ripen up on counter top or windowsill but not in the refrigerator. Ron Wolford, University of Illinois Extension horticulturist, notes that green tomatoes can be harvested before a predicted frost.

“You can tell when a tomato is nearing maturity by its light green, almost translucent, appearance,” according to Barb Fick, horticulturist with the Oregon State University Extension Service. “Tomatoes that are not in this 'mature green' stage won't ripen.”

Kansas State Extension Master Gardeners note that "not all green tomatoes will ripen off the vine. They must have reached a "mature green stage." Look for full-sized tomatoes with a white, star-shaped zone on the bottom end of the green fruit. Also, on maturing green tomatoes, skin at the blossom end may be beginning to change color from green to pink or red." Use immature green tomatoes in recipes such as salsas or fried.

Ron Wolford recommends removing the stems, washing and drying the fruit. Wrap each tomato in newspaper and place them in a single layer on a shelf or in a box. You can also put them in deep straw or just lay them in a box so that they are not touching. Check tomatoes every few days and discard any that show signs of rot.

Tomatoes will ripen satisfactorily in the dark, according to Fick, and sunlight is not needed; however, temperature is important. Storage temperature should range from 60 to 70 degrees. They will ripen over a period of three to four weeks.

Picking and storing the mature green tomatoes in mid-October means there's a good chance you can have some tasty, home-grown tomatoes for the Thanksgiving celebration.

CKagan, Master Gardener

**********

Interested in herbs? Looking for Gardening Gifts?

 Check out the Herb Sampler  description on this Blog  

SPECIAL Price reduction on Amazon here

The Second Edition Herb Sampler (2019) is available through Amazon. 


Saturday, September 4, 2021

Look Out for Jumping Earthworms!


From the Penn State Extension Article (August, 2018) by Nancy Knauss

Asian jumping worms are a relatively new invasive species but they are rapidly spreading across the United States. They can be found in the Southeast, along the Eastern Seaboard, and in mid-Atlantic, Midwest, and some Northwestern states.

There are still native species of earthworms in a few areas of North America, but in states where glaciation occurred the native species were wiped out. Forests developed without them, but in time European earthworms appeared and began to burrow through the soil. As the tunnels were created, the earthworms mixed soil components and improved air and water movement. Unfortunately, European nightcrawlers are now being displaced by the destructive Asian jumping worms.

These invasive worms are members of the genus Amynthas and live in the organic matter or the topmost layer of soil. This upper layer of organic matter protects the soil from erosion. It is in this duff layer of the forest floor where many of the tree roots establish and wildflowers grow. Asian jumping worms are ravenous feeders and they quickly consume the organic matter and degrade the soil. Nutrients from their castings are rapidly released with a small amount actually reaching the roots of plants. During heavy rainstorms, the nutrients are quickly lost and the soil may be unable to support plant growth. Where there was once lush vegetation and wildflowers, there is only bare soil. When such a disturbance happens, it provides an opportunity for an invasive plant species such as garlic mustard or stilt grass to move in. The structure of the soil is also damaged and often there will be voids under tree roots that are near the surface of the soil.

Asian jumping worms are an annual species—the adults die after the first freeze. The cocoons, which are about the size of a mustard seed, will survive the winter and hatch in mid-April after temperatures reach 50°F for a consistent period. One worm can produce many cocoons without mating. While the cocoons can survive the winter temperatures, the hatchlings cannot survive freezing temperatures.

Worm hatchlings (PSE MG Program)

How do you know if you have Asian earthworms?

One telltale sign of an infestation is a very uniform, granular soil created from worm castings, the nutrient-rich soil that the worms leave behind. The texture of this soil is often compared to coffee grounds.

When you scratch the top layer of soil, you will see the worms thrashing about with an erratic, snakelike movement. These worms, which can reach 6 inches in length, are much more active than European nightcrawlers.

If you examine a worm close-up, you will notice the prominent band around the body of the worm called the clitellum, where cocoons are produced. On a jumping worm, the band completely encircles the body, is milky white to light gray, and is flush with the body. On European nightcrawlers, the clitellum is raised and reddish-brown color and does not wrap entirely around the body

What can you do to prevent jumping worms from invading our forest and landscapes?

It is very difficult to remove an invasive species once it is well established in an ecosystem, so the focus must be on preventing the spread of Asian earthworms. The cocoons, which are very small and difficult to see, can be easily introduced to your garden in compost, bark, or leaf mulch, or when swapping plants with friends.

Consider reducing the amount of organic matter that you add to your garden each year. Most importantly, when purchasing bulk mulch or compost, use a reputable producer that has heat-treated the material to a temperature of 130°F for at least three days to destroy the cocoons. The other option is to purchase bagged mulch.

Check any plants that you bring into your garden for the distinctive coffee ground like soil. If present, throw out the plant, or remove all soil and rinse the roots thoroughly before bringing the plant into your garden.

Coffee ground-like soil (PSE MG Program

What to do to control jumping worms?

Research is currently being conducted on invasive worms at the University of Wisconsin and several practices do show some promise of control. Once you have identified jumping worms in your landscape, you will need to eliminate both the cocoons and the worms.

If you have a small population of jumping worms, handpick and destroy adult worms by bagging them and throwing them in the trash. Brad Herrick, an ecologist, and researcher at the University of Wisconsin Arboretum recommends making a mustard solution of one-third cup dry mustard in one gallon of water and drenching the area. The solution will irritate the worms and bring them to the soil surface where you can easily remove them.

While research is ongoing, abrasive materials such as biochar (ground up charcoal) and diatomaceous earth (fossilized diatoms) may show some promise in killing adult jumping worms. Incorporate one of these products into the infested soil to a depth where the worms are located. Worms that come in contact with the materials and will be adversely affected.

In addition, an organic fertilizer used by golf course managers has been effective in eliminating jumping worms. The fertilizer made from tea seed meal irritates and eventually kills these worms when applied to the soil. Two applications are recommended, one in late April or early May to target the young hatchlings and again in the summer to suppress the remaining worms.

It is important to also destroy Asian jumping worm cocoons. The cocoons are sensitive to heat and can be destroyed with clear plastic solarization. In late spring or summer, cover moistened soil with a sheet of transparent polyethylene for two to three weeks or until the soil temperature exceeds 104°F for at least three days.

Diligence in following the preventive measures and implementing control methods for both the cocoons and adult worms can impact the health of your soil by eliminating these destructive invasive worms.

**********

Are you interested herbs? Check out the Herb Sampler on this Blog 

The Second Edition Herb Sampler (2019) is available through Amazon.


I Write: The Distance Between Us

At our monthly Writing is Fun meetings we decide a prompt for writing for the next meeting. Length is set at 2 pages so we can read them at ...